Connect With Me In Facebook

Welcome to DefendHackers, If u want to Apply for a Blogroll as a Author , With h4ckfreak Mail me @ suren.click@gmail.com

Mark Zuckerberg tells 8th graders “there’s no shortcuts” and to make friends

By h4ckfreak

Metasploit Quick Start Referennce Guide

Metasploit Quick Start Referennce Guide , By h4ckfreak

IP Security

IP Security By H4ckfreak.

15 Network Admin Apps for Android

15 Network Admin Apps for Android , By h4ckfreak

Break All OS Passwords Using KON

Break All OS Passwords Using KON , By h4ckfreak

Recover Or Reset Ur Windows Pwd Using Ubuntu

Recover Or Reset Ur Windows Pwd Using Ubuntu , By h4ckfreak

Security Blueprint For Ethical Hackers..

By h4ckfreak

Blocking IP Using IPSec

By h4ckfreak

Preventing DDos Attacks, Combat Steps abd Tools...

By h4ckfreak

Wednesday, June 22, 2011

How Kerberos Authentication Works

Recently wen i was reading the LM algorithm, like how it works , how the passwords are concatenated and encrypted and stored as Binary form in the SAM Database , i get stuck on with Kerberos , what is the role of in windows ? so i asked in fb page, friend called Vishal Sharma has said , Keberos mechanism used wen a client is connect to the domain or to the ACTIVE DIRECTORY, So i tried to read more abt that , and i found this is the best article i found on internet,thought of sharing with you, Must read for All Network Enginners and Admins

And You may not know it, but your network is probably unsecured right now. Anyone with the right tools could capture, manipulate, and add data between the connections you maintain with the internet. The security cat and mouse game isn’t one sided, however. Network administrators are currently taking advantage of Kerberos to help combat security concerns.

Project Athena

Project Athena was initiated in 1983, when it was decided by the Massachusetts Institute of Technology that security in the TCP/IP model just wasn’t good enough. A total of 8 long years of research passed before Kerberos, named after the three-headed Greek mythological dog known as Cerberus, was officially complete.
The result of MIT’s famous research became widely used as default authentication methods in popular operating systems. If you are running Windows 2000 or later, you are indeed running Kerberos by default. Other operating systems such as the Mac OS X also carry the Kerberos protocol. Kerberos isn’t just limited to operating systems, however, since it is employed by many of Cisco’s routers and switches.

What Does It Protect Against, Anyways?

If you have ever used an FTP program over a network, you are at risk. If you have ever used a Telnet program over a network, you are again at risk. These are just two examples of how little security some applications allow. FTP and Telnet use what are called plaintext passwords, or otherwise known as cleartext passwords. These passwords are ridiculously easy to intercept with the right tools.
Anyone with a simple packet sniffer and packet analyzer can obtain an FTP or telnet logon with ease. With that kind of sensitive information being transmitted, the need for Kerberos is obvious. This need doesn’t stop there, however. Sure FTP and Telnet related logons are easy to intercept, but then again so is every other connection any of your applications has to the internet.
Through a process of man in the middle attacks, any hacker can get most logon information for just about anything. From online bank passwords to private passwords on your computer, they are all generally vulnerable to this attack. A man in the middle attack generally occurs when the hacker acts as the “man in the middle” between two computers. The hacker attempts to pretend to each computer that it is in fact, the computer they have connected to. In reality, all the data is being routed to the hacker, who can then modify or add instructions to the data.

Okay, This Sounds Useful…But How Does It Work?

Kerberos operates by encrypting data with a symmetric key. A symmetric key is a type of authentication where both the client and server agree to use a single encryption/decryption key for sending or receiving data. When working with the encryption key, the details are actually sent to a key distribution center, or KDC, instead of sending the details directly between each computer. The entire process takes a total of eight steps, as shown below.
kerberos client
1. – The authentication service, or AS, receives the request by the client and verifies that the client is indeed the computer it claims to be. This is usually just a simple database lookup of the user’s ID.
2. – Upon verification, a timestamp is created. This puts the current time in a user session, along with an expiration date. The default expiration date of a timestamp is 8 hours. The encryption key is then created. The timestamp ensures that when 8 hours is up, the encryption key is useless. (This is used to make sure a hacker doesn’t intercept the data, and try to crack the key. Almost all keys are able to be cracked, but it will take a lot longer than 8 hours to do so)
ticket granting ticket
3. – The key is sent back to the client in the form of a ticket-granting ticket, or TGT. This is a simple ticket that is issued by the authentication service. It is used for authenticating the client for future reference.
ticket granting server
4. – The client submits the ticket-granting ticket to the ticket-granting server, or TGS, to get authenticated.
encrypted key
5. – The TGS creates an encrypted key with a timestamp, and grants the client a service ticket.
6. – The client decrypts the ticket, tells the TGS it has done so, and then sends its own encrypted key to the service.
service server
7. – The service decrypts the key, and makes sure the timestamp is still valid. If it is, the service contacts the key distribution center to receive a session that is returned to the client.
client server
8. – The client decrypts the ticket. If the keys are still valid, communication is initiated between client and server.
Is all that back-and-forth communication really necessary? When concerning speed and reliability, it is entirely necessary. After the communication is made between the client and server, no further need of transmitting logon information is needed. The client is authenticated until the session expires.

Yet More Authentication

The authentication method described above seems a little one-sided. Kerberos provides support for mutual authentication, for a more secure protection against man in the middle attacks. Remember how the client no longer needs to send logon information after the authentication takes place? Well it sure would ruin everything if a hacker just intercepted our communication to the server and pretended to be us!
This type of authentication is fairly easy to understand, since it only involves two systems.

The Mutual Authentication Process


  • 1. The first system creates a challenge code made up of random numbers.
  • 2. This code is sent to the second system, which generates a response to the received code. This response and a challenge code of its own are then sent back to the first system.
  • 3. The first system verifies the response of the second system, and then sends a response to the challenge code it received.
  • 4. When the second system receives the response, it is verified. If all is well, it notifies the first system that they are indeed mutually authenticated.

This type of authentication uses challenge codes to ensure that both computers are who they claim to be. If someone tries to intercept the data, they obviously will fail because they can’t pretend to be one of the computers after they have been authenticated with challenge codes.

Sounds Great! Any Drawbacks I Should Know About?

Of course, nothing is perfect. Kerberos has a couple of main flaws that system administrators need to take into account.
First and foremost is the need of the Kerberos server. This server will handle all the functions required for authentication. If this server goes down, no one can get authenticated, and thus- the network is down. A total network crash can be prevented by using more than one Kerberos server, but that is more costly than some people would like to think.
Next, we have the issue of clock synchronization. Since Kerberos uses timestamps to handle all activity, the clocks on all host machines must be within 10 minutes of the Kerberos server’s clock. Since not all clocks are perfect, the host clock and server clock will eventually be misaligned enough to cause a failure. This can usually be remedied by keep clocks up to date, or use a Network Time Protocol, or NTP.

Closing Comments

Kerberos isn’t the only encryption protocol available. There are multiple ways to encrypt data, and this holds true for many types of different applications. Email encryption protocols, for example, are a breed all of their own.
With a product that has been researched and developed for over 8 years, it is generally expected that the product should be well polished. Kerberos doesn’t fail to deliver, and this can be seen by looking at all the vendors who use it. Cisco, Microsoft, Apple, and many others rely on this faithful three-headed dog for network security.
As Greek mythology goes, you could get around Cerberus by gently lulling him to sleep with honey cakes. Rest assured it will take a lot more than that to get past the famous Kerberos security.


Source: Learn networks

Monday, June 20, 2011

Control computers remotely with your Android phone

As a Quote Saying , iPhone is a RICH MANS Phone , and ANDROID is a POOR MANS iPhone, Android is Going Awesome, And taking Google a way One Step above , Google has started to Conquere the World Once again, THE INTERNET GIANT..! We Love you

And So guys Are you tired of providing on-site tech support for your friends and family? Providing support remotely is an easy way to help them while maintaining your sanity. If you don't have a computer nearby, but have your Android phone, you can still help. Here's how:
Computer setup
Step 1:
On the computer you want to remote control, download "TeamViewer QuickSupport" from TeamViewer. The downloaded file is named TeamViewerQS_en.exe. The program is self-contained so it does not need to be installed.
Step 2:
Double-click on the TeamViewerQS_en.exe file to launch TeamViewer on the computer you want to control.
Step 3:
At the main screen, the numeric ID of that system is listed and a numeric password for that session. Make a note of the ID and password as you'll need that information later.
(Credit: Screenshot by Ed Rhee)
 
Step 4:
If you're setting this up on someone else's computer, you may want to create a shortcut for them or place the file on their desktop so they can find it more easily when they need your help. Once you've connected to the computer, a small window with a session list will pop up in the lower right-hand corner.
A session list will pop up on the remote computer.


(Credit: Screenshot by Ed Rhee)
Android setup
Step 1:
On your Android phone, install TeamViewer from the Android Market and launch it. In the first box, enter the ID of the "partner" computer. In the second box, enter the password and tap the "Connect to partner" button.
 
(Credit: Screenshot by Ed Rhee)
Step 2:
Once connected, you'll see gesture control instructions.
 
(Credit: Screenshot by Ed Rhee)
Step 3:
Close the instruction screen to see the desktop of the remote computer.
The desktop can be zoomed in or out.


You've got control! Now you can help your in-law's figure out how to use Netflix streaming or add an RSS feed to Google Reader. You can help someone with just about anything he or she might need help with, without having to physically be there. You can use the mouse, type, print, and even reboot the remote computer.
The Android version of TeamViewer does have a few limitations, compared with the computer version. The Android version does not support local audio, text chat , video chat, or file transfers.


I hope you all People FIND This Intersting, Wannna Kick Somebody ass.ROFL...! i reallly would like to hear something from you all .wat u feel about "DH" Drop me a comments

Sunday, June 19, 2011

Computer account password removal using PC Login Now 2.0

PCLoginNow   is an easy-to-use tool to reset local administrator and other accounts passwords on Windows system. No need to reinstall the system. It resets Windows passwords and Windows security settings instantly. All version of Windows are completely supported. It’s an incredible CD for Home users and Businesses. And most of all, it’s the most popular and safe solution for removing your Windows password until now. Besides the abilities of resetting passwords, PCLoginNow can also help you maintain, change accounts policy setting and properties. You can easily upgrades an general account to administrator level, lock or unlock those accounts you don’t need anymore, And moreover, all of these are done without booting your tedious, time-consuming Windows System.The most powerful feature PCLoginNow have is to support Syskey. SYSKEY is an optional feature since Windows NT 4.0 SP3. It is meant to protect against offline password cracking attacks so that the SAM database would still be secure even if someone had a copy of it. Even though the system registry is protected by Syskey, PCLoginNow can easily bypass this mechanism and reset the Windows passwords.

Only 4 simple steps are required to turn a limited user account into administrator.

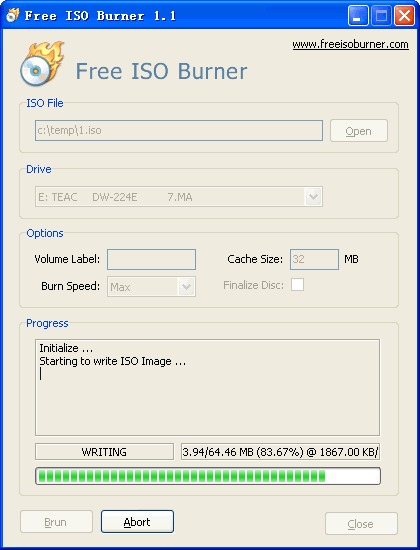
1. Download PCLoginNow & Free ISO Burner.

2. Burn the ISO image to a CD/DVD.


3. Boot up the computer with the CD/DVD.

4. Click the Next button when you see the message that says “PC Login Now! is ready to

start, please click NEXT to continue…”

5. Select the Windows system that is found by PC Login Now program.

6. Select the user account that you want to edit, check “is Administrator” and click Next.


7. Reboot and the user is now a local administrator of the computer.

I find this tool amazing because it can turn a user from zero into hero. I understand that some students are adventurous and would like to install or configure the system the way they like it but they cannot do it with a limited user account. Hence, they find a way to secretly upgrade their limited account to a local computer administrator and now they can do whatever they want. We cannot set a BIOS password because if the students entered the wrong security password for 3 times, it’ll be locked and we’ll have to contact HP support and get them to reset it. If you have a way to prevent from the students from editing user accounts without logging in as administrator, please share it with me.

Tuesday, June 14, 2011

Windows 7 for VPN Single Sign On


Let's begin with a computer that has Windows 7 installed and is not yet domain-joined. Begin by logging on using the credentials of a local administrator on the computer:

Figure 1: Step 1 of configuring Windows 7 for VPN Single Sign On
Once you are interactively logged on to the Windows desktop, open the Network and Sharing Center. The next step is to create your VPN connection, and you begin doing this by clicking the Set Up A New Connection Or Network link circled in red below:

Figure 2: Step 2 of configuring Windows 7 for VPN Single Sign On
In the Set Up A Connection Or Network wizard, click the Connect To A Workplace option as shown below. If the user of the computer is going to be using a dial-up modem connection instead of a VPN tunnel over the public Internet, select the fourth option in this wizard page instead and proceed similarly to the steps that follow.

Figure 3: Step 3 of configuring Windows 7 for VPN Single Sign On
In the Connect To A Workplace wizard, click the Use My Internet Connection (VPN) option as shown next:

Figure 4: Step 4 of configuring Windows 7 for VPN Single Sign On
On the next wizard page, specify a FQDN or IP address for the VPN server the user will use to connect to the corporate network, and type a friendly name for this connection as shown below. Also be sure to select the Allow Other People To Use This Connection checkbox as shown below. Selecting that checkbox is important since it makes the System built-in identity the owner of the VPN connection and not the user (Karen) who is configuring the connection on the computer, and that will allow other users of the computer to perform VPN SSO logon. And if the user of the computer will be using his smart card for logging in, be sure to select the Use A Smart Card checkbox as well. Finally, if the computer you are configuring is not currently connected to the Internet, you can select the Don't Connect Now option which will set up the new VPN connection but not initiate it until you manually choose to do so later.

Figure 5: Step 5 of configuring Windows 7 for VPN Single Sign On
On the next wizard page, type the credentials that will be used for logging on to the domain. In this case, Karen Berg is configuring the computer for her own personal use, so she enters her own credentials here.

Figure 6: Step 6 of configuring Windows 7 for VPN Single Sign On
Finish the wizard to set up the new VPN connection. Once this is done, the user can click the Network icon in the notification area of the taskbar, and a popup window will appear showing the newly created VPN connection:

Figure 7: Verifying the VPN connection.
To complete setting up her computer, Karen now joins her computer to the domain. If she is in the office, she can do this by connecting the computer to a LAN drop, clicking Start, and right-clicking Computer to open the System Control Panel item. Then she clicks Change Settings and join her computer to the domain the usual way. If she is on the road sitting in a hotel somewhere, she would first use a LAN drop in a hotel room or a secure wireless hotspot to gain Internet access and then click the Network icon in the notification area, click My VPN Connection in the popup window, click the Connect button, provide her domain credentials when prompted to do so, establish a VPN connection to the corporate network, finish logging on to her desktop, and then join her computer to the domain in the usual way.

Logging On using VPN SSO

Now Karen is on the road and she needs to access shared resources on her company's internal network over a VPN connection. To do this, she turns on her computer and waits until the logon screen appears:

Figure 8: Step 1 of logging on using VPN SSO
Karen then presses Ctrl+Alt+Del and sees the usual logon screen as shown next:

Figure 9: Step 2 of logging on using VPN SSO
Instead of typing her password, Karen clicks the Switch User button, and an additional blue button now appears near the bottom right of her screen. This button is circled in red in the next figure, and if Karen hovers her mouse over this button a tooltip saying "Network Logon" appears:

Figure 10: Step 3 of logging on using VPN SSO
Karen clicks the blue Network Logon button, and this opens a new logon screen called My VPN Connection (this was the friendly name that Karen gave to the VPN connection she created earlier). Karen now types her username and password (if she uses a smartcard then she selects the checkbox instead):

Figure 11: Step 4 of logging on using VPN SSO
After entering her credentials, Karen presses Enter and a dialog box appears indicating that the VPN connection is being established with the remote network:

Figure 12: The VPN connection is being established
Once the VPN connection has been established, the credentials Karen specified will automatically be used to log her on to the desktop of her computer. Once her desktop has appeared, she can browse shared resources on the corporate network over the VPN connection, upload and download files, and perform her work.


 Thanks For Craig Morse For his Contribution in this tutorial For DEFEND HACKERS

Sunday, June 12, 2011

Mark Zuckerberg tells 8th graders “there’s no shortcuts” and to make friends


When I graduated from eighth grade, my class got a pizza party. When the students at Belle Haven Middle School in Menlo Park, Calif. graduated, they got Mark Zuckerberg. Zuckerberg, or Mark Zuckerman, as the principal accidentally introduced him as, spoke at the eighth-grade graduation relaying some of the most important life lessons he’s learned during his 27 years on this planet.
Mr. Z, as the principal also called Zuckerberg, is moving the Facebook offices to Menlo Park and said the company is going to be neighbors with the school. Zuckerberg stressed three main things in his speech that he claims society got wrong: There are no shortcuts in life, great relationships are extremely important, and do what you love.
Zuckerberg started by saying that everything that’s worth doing is actually really hard and take s  a lot of work. He said society often isn’t quite right when things in movies and TV appear to have come to fruition without much work. Mr. Z alluded to the Social Network movie in one of his examples. He said that a film about a kid in college with an idea that became this big business overnight “couldn’t be further from the truth.” He said it’s “not about a single moment of inspiration or brilliance.” Instead, it’s about years and years of hard work and practice. He said that a lot of building a company or product like Facebook is just about determination and believing that you can do it. He stressed that it’s actually hard work that underlies everything that you do, and “there’s no shortcuts.”
Secondly, Zuckerberg stressed the value of friendship and forming good relationships with people you can trust. He said that a lot of people will tell you to just focus on school and grades while you’re growing up, but that it’s important to focus on having friends and really enjoying yourself, too. Zuckerberg said that a lot of times the experts tell you that you can’t do something even when you think you can. He said this is another thing that society gets wrong a lot. Zuckerberg said great friendships are what makes life a lot of fun and meaningful and enables you do to awesome things.
 Watch this Video here :


Lastly, Zuck told the students to “do what you love.” He said that you can set your minds to a lot of different things, and you can overcome things you don’t like doing, but that it’s a lot easier to focus on challenges that you actually enjoy doing. “If you do stuff that you love, it’s a lot more meaningful and takes on a lot more purpose,” said Mr. Z.
It all sounds so easy coming from Zuckerberg, the world’s youngest billionaire. But who knows, maybe some of these eighth graders will be working with Zuck in a few years.

Thursday, June 9, 2011

Crack BIOS Mater Password (UPDATED)


Basic BIOS password crack - works 9.9 times out of ten


This is a password hack but it clears the BIOS such that the next time you start the PC, the CMOS does not ask for any password. Now if you are able to bring the DOS prompt up, then you will be able to change the BIOS setting to the default. To clear the CMOS do the following:
Get DOS prompt and type:
DEBUG hit enter
-o 70 2e hit enter
-o 71 ff hit enter
-q hit enter
exit hit enter
Restart the computer. It works on most versions of the AWARD BIOS.

Disable Facial Recognition in FACEBOOK

I rarely upload photos to my Facebook account and was surprised the other day when, after uploading a few vacation pictures, Facebook had identified the faces of the people in my photos and asked if I wanted to tag them. Of course, it’s not always accurate, but I was impressed at how Facebook got about nine out of 10 matches right, identifying the correct names with the faces. It made my tagging-time much lower, but it also creeped me out a bit. Where did this feature come from, and why wasn’t I notified of it?


The facial recognition feature, called Tag Suggestions, is selected as the default on Facebook, which, not surprisingly, has a lot of people upset. It’s really not hard to change the settings, but it’s a little annoying that you have to opt out instead of opt in. If you’d prefer to opt out and turn off facial recognition, here’s how:
    1. Look to the upper-right-hand corner of your screen and click the Account drop-down menu. 2. Click Privacy Settings. 3. Select the Custom tab on the left-hand side of the column towards the bottom of the page. 4. Select the Customize Settings option at the bottom. 5. The second set of options on this page is “Things others share.” Click on the Edit Settings button under “Suggest photos of me to friends.” 6. Here, you’ll see a dropdown menu on the right selected as “Enabled.” Click that and change to Disabled.
And that’s it! Once you disable the Tag Suggestions feature your friends won’t be able to automatically tag you in any photos. You may not see the option yet, but it’s coming. Facebook is in the process of rolling it out worldwide, so make sure to check back if you’re concerned about being tagged. If not, don’t worry about it and wait for the slew of email notifications from your Facebook friends telling you that you’ve been tagged in 30 photos.

Wednesday, June 8, 2011

Mark Zuckerberg Kills What he Eats


Mark Zuckerberg leaned Chinese last year. This year Mark Zuckerberg is pursuing a new “personal challenge”, when he’s not busy connecting people across the world. Its about food. Mark Zuckerberg only eats what he kills. It includes a lobster, chicken, pig and a goat. Zuckerberg even posted a message on his private Facebook page on May 4 saying:
“I just killed a pig and a goat.”

Mark takes a personal challenge each year (in 2009, he wore a tie every day), and this year is about animals and meat.
“This year I’ve basically become a vegetarian since the only meat I’m eating is from animals I’ve killed myself,” Zuckerberg wrote in an email to Fortune.
He told Fortune in an email that:
I spend almost all of my time building Facebook, so these personal challenges are all things I wouldn’t normally have the chance to do if I didn’t take the time. Last year, for example, my personal challenge was to learn Chinese. I blocked out an hour every day to study and it has been an amazing experience so far. I’ve always found learning new languages challenging, so I wanted to jump in and try to learn a hard one. It has been a very humbling experience. With language, there’s no way to just “figure it out” like you can with other problems — you just need to practice and practice. The experience of learning Mandarin has also led me to travel to China, learn about its culture and history, and meet a lot of new interesting people


This year, my personal challenge is around being thankful for the food I have to eat. I think many people forget that a living being has to die for you to eat meat, so my goal revolves around not letting myself forget that and being thankful for what I have. This year I’ve basically become a vegetarian since the only meat I’m eating is from animals I’ve killed myself. So far, this has been a good experience. I’m eating a lot healthier foods and I’ve learned a lot about sustainable farming and raising of animals.
I started thinking about this last year when I had a pig roast at my house. A bunch of people told me that even though they loved eating pork, they really didn’t want to think about the fact that the pig used to be alive. That just seemed irresponsible to me. I don’t have an issue with anything people choose to eat, but I do think they should take responsibility and be thankful for what they eat rather than trying to ignore where it came from.